How to Draw A Xenomorph Easily
How to Draw A Xenomorph. The history of cinema is filled with iconic and recognizable monsters that have given countless people nightmares.
Also, check our Tiger Coloring Pages For Kids.
In 1979, the film Alien presented a terrifying idea of what a predatory alien species might look like.
The design was unlike any other depiction of an alien and remains popular to this day.
The Xenomorph has appeared in many movies, video games, comics, and more, and many people also enjoy learning how to draw a Xenomorph.
For fans of this intimidating Alien, this guide is the perfect way to learn how to portray him in some artwork.
We hope you enjoy working with us on this step-by-step guide to drawing a Xenomorph in just 6 steps!
How to Draw A Xenomorph
Step 1
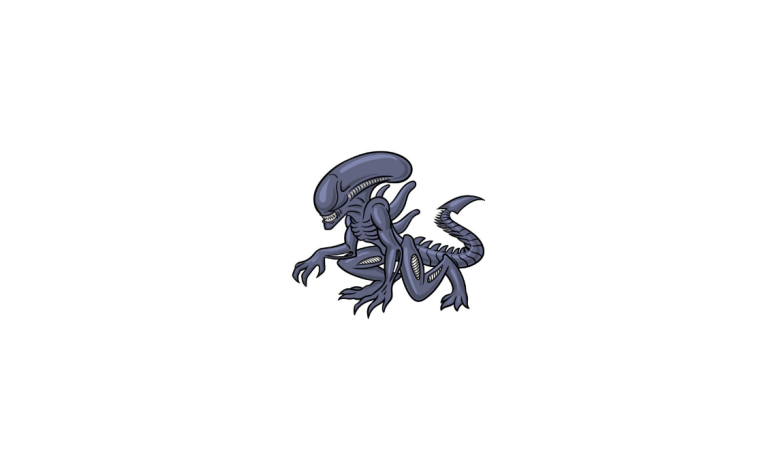
The classic Xenomorph design was created by artist H.R. designed. Giger and the Alien’s head is one of the most recognizable aspects of the design.
For this reason, we will start with the head for this first step of our guide on drawing a xenomorph.
The top of the head has a long, rounded shape that protrudes past the back of the head. So you can use a curved line to draw that part of the head as it appears in the reference image.
The Xenomorph’s face is small and stocky compared to the rest of the head, allowing you to use angular lines for the small open mouth.
Finish off with a straight line for the jaw so we can move on to the next step.
Step 2
In this second phase of your xenomorph drawing, you will add some details and additions to the Alien’s head and chest areas.
First, add some jagged lines in the open mouth to give the alien sharp teeth. We’ll then draw some curved lines in the outline of the head to give it more definition.
Next, we’ll start with the creature’s arms and chest, and you can start this arm with some curved lines.
The arms are quite lean and muscular; we’ll only draw the shoulders, biceps, and elbows now.
The Alien’s chest is quite thin and bony, and with some curved lines, you can show off the Xenomorph’s bony chest.
Step 3
In this third step of our guide to drawing a xenomorph, you can finish the outlines for the rest of the Alien’s limbs.
First, draw the hand at the end of the arm you started with in the previous step. This hand will have long fingers ending in sharp, pointy claws.
Next, draw a similar-looking arm on the other side and raise it a bit. The legs are drawn with a few more curved lines to represent them folded under the Alien.
These legs will be much thicker than the arms,, and how they are positioned makes the alien look ready to pounce.
Step 4
In this fourth part of your xenomorph drawing, you will add more iconic elements to the Alien.
The first is the thick, rounded spikes that protrude from the creature’s back. Draw three of these curvy shapes, and then we can add the tail.
The Xenomorph’s tail is long and curved, with sharp tips protruding from the tip. There is also a lot of line detail on the tail, giving the impression that it is divided into several segments.
The tail ends in a big sharp triangle shape, and once it’s drawn, we can move on to the final details in the next step.
Step 5
You have completed the outline of the Alien. In this step of our guide to drawing a xenomorph, we’ll take care of the final details and finishing touches.
Various rounded and pointed shapes on the Xenomorph’s legs have lines drawn into them to create texture.
Finally, add subtle line detail to the Xenomorph drawing to make it even more dynamic.
Then you can add a few extra details and additions at the end to top it off.
One idea would be to draw a background and use your favorite scene from the various Alien movies as inspiration.
Step 6
A few Xenomorph variants exist throughout the Alien franchise, but this Xenomorph theme features the original’s classic dark color scheme.
In our reference image, we’ve opted for dark gray tones with lighter gray and blue accents.
The Alien in the movies has a slight shimmer, so using these lighter shades will help give your skin a little more luster.
Will you use similar colors to recreate the classic Xenomorph design or different colors to create a different twist? We can’t wait to see what you’re looking for!
Your Xenomorph Drawing is Finished!